This apple coleslaw is my secret weapon for bringing fresh, crunchy life to any meal. It pairs beautifully with pulled pork sandwiches, grilled chicken, and even hearty barbeque chicken wraps. I love how a simple slaw can transform an ordinary dinner into something your family actually gets excited about.
Why I Keep Coming Back to This Apple Coleslaw
My grandmother taught me something important about coleslaw years ago, and it changed the way I eat vegetables forever. She was sitting at her kitchen table in rural Arkansas, shredding cabbage by hand for a church potluck, and she said, “Lisa, nobody remembers the side dish that tastes like punishment. They remember the one that makes them smile.”
That stuck with me. Too many people think coleslaw is just… boring. Cabbage. Maybe some mayo. Done. But when you add crisp, tart apples and a dressing that actually has personality? Everything shifts. This isn’t a heavy, mayonnaise-laden situation. It’s balanced. It’s bright. It tastes like someone actually cared.
I developed this recipe during my early years as a registered dietitian because I kept seeing clients struggle with the same thing: they wanted their families to eat more vegetables, but the vegetables they were serving felt like obligations instead of celebrations. This apple coleslaw changed that conversation. Suddenly, kids were asking for seconds. Adults were requesting the recipe. The side dish became the star.
What is Apple Coleslaw?
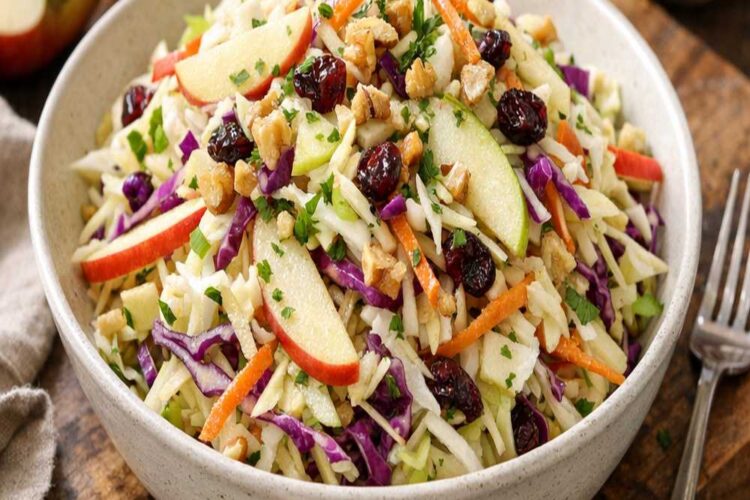
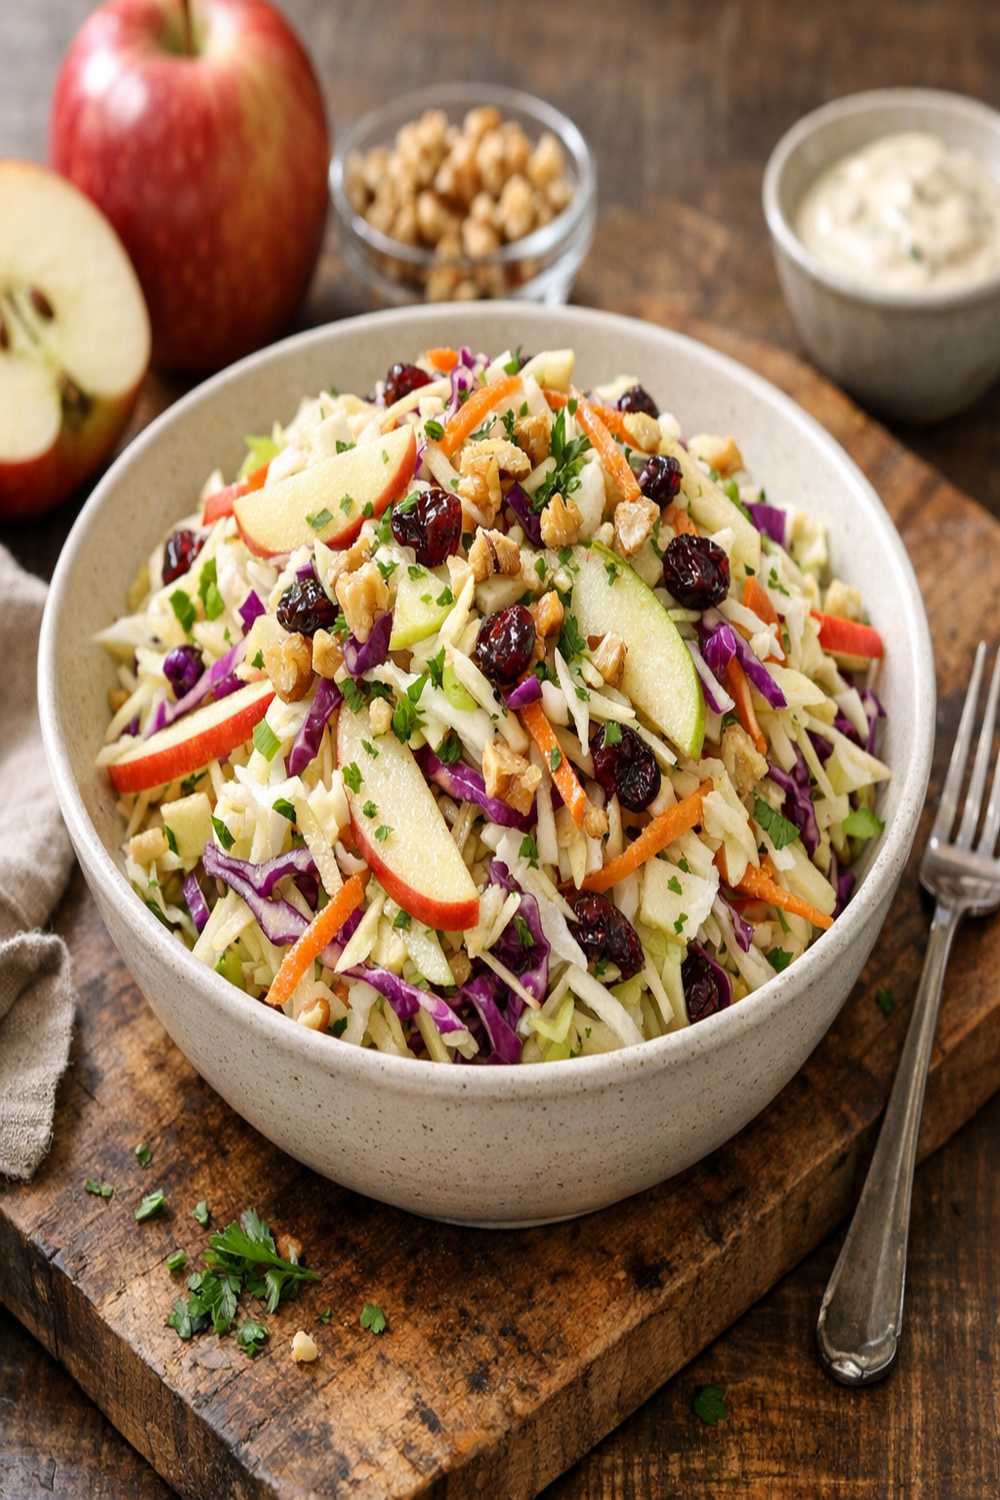
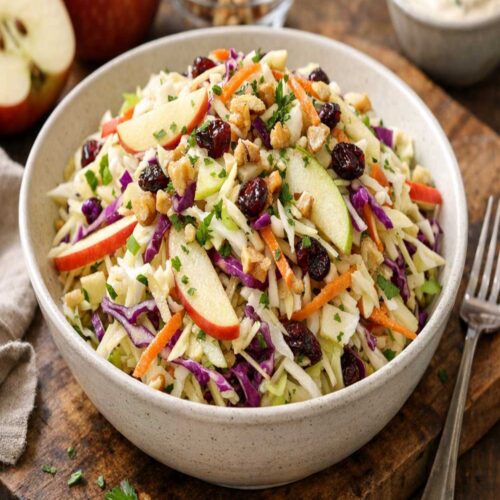
Apple coleslaw is a vibrant twist on the traditional cabbage slaw, brightened with fresh, tart-sweet apples and bound together with a tangy-creamy dressing. Unlike heavier slaws that sit in bowls of mayo, this one strikes a beautiful balance between richness and brightness.
The beauty of this dish lies in its versatility and nutritional profile. You’re getting raw cruciferous vegetables, which are loaded with vitamin C, fiber, and powerful phytonutrients that support digestion and immune function. The apples add natural sweetness while contributing pectin—a soluble fiber that helps stabilize blood sugar. From a clinical nutrition perspective, this is one of those rare recipes where something genuinely delicious is also genuinely good for you.
The magic happens when you let the slaw rest. The dressing slowly softens the cabbage while maintaining crunch, and the flavors marry together into something more complex than any of the individual components. It’s a lesson in patience and how time transforms simple ingredients into something special.
Why You’ll Love This Apple Coleslaw Recipe
- It’s crunchy and stays that way – Unlike some slaws that get soggy, the balance of acid and ingredients keeps this crisp for days. The apple cider vinegar actually helps maintain the cell structure of the cabbage, preventing that waterlogged texture.
- The flavor is balanced and sophisticated – You get sweetness from the apples and sugar, tanginess from the vinegar, creaminess from the mayo, and subtle spice from the whole grain mustard. Every bite is interesting, which means people actually want to eat it.
- It’s genuinely nutritious – Raw cabbage provides glucosinolates, compounds that research suggests support cellular health. The carrots add beta-carotene, and apples provide quercetin, a natural anti-inflammatory. You’re not eating virtuous food here—you’re eating food that happens to be good for you.
- It comes together in minutes – Prep time is minimal, which matters on busy weeknights. Five minutes of actual hands-on time gets you a side dish that tastes like you fussed all day.
- It serves a crowd effortlessly – This slaw scales beautifully. Whether you’re feeding four or forty, you can double, triple, or multiply the recipe without any adjustments to technique or timing.
- It bridges the gap between what’s healthy and what tastes good – As a dietitian, I’ve spent years watching people choose between nutrition and enjoyment. This recipe refuses that false choice. It’s both.
The Ingredients
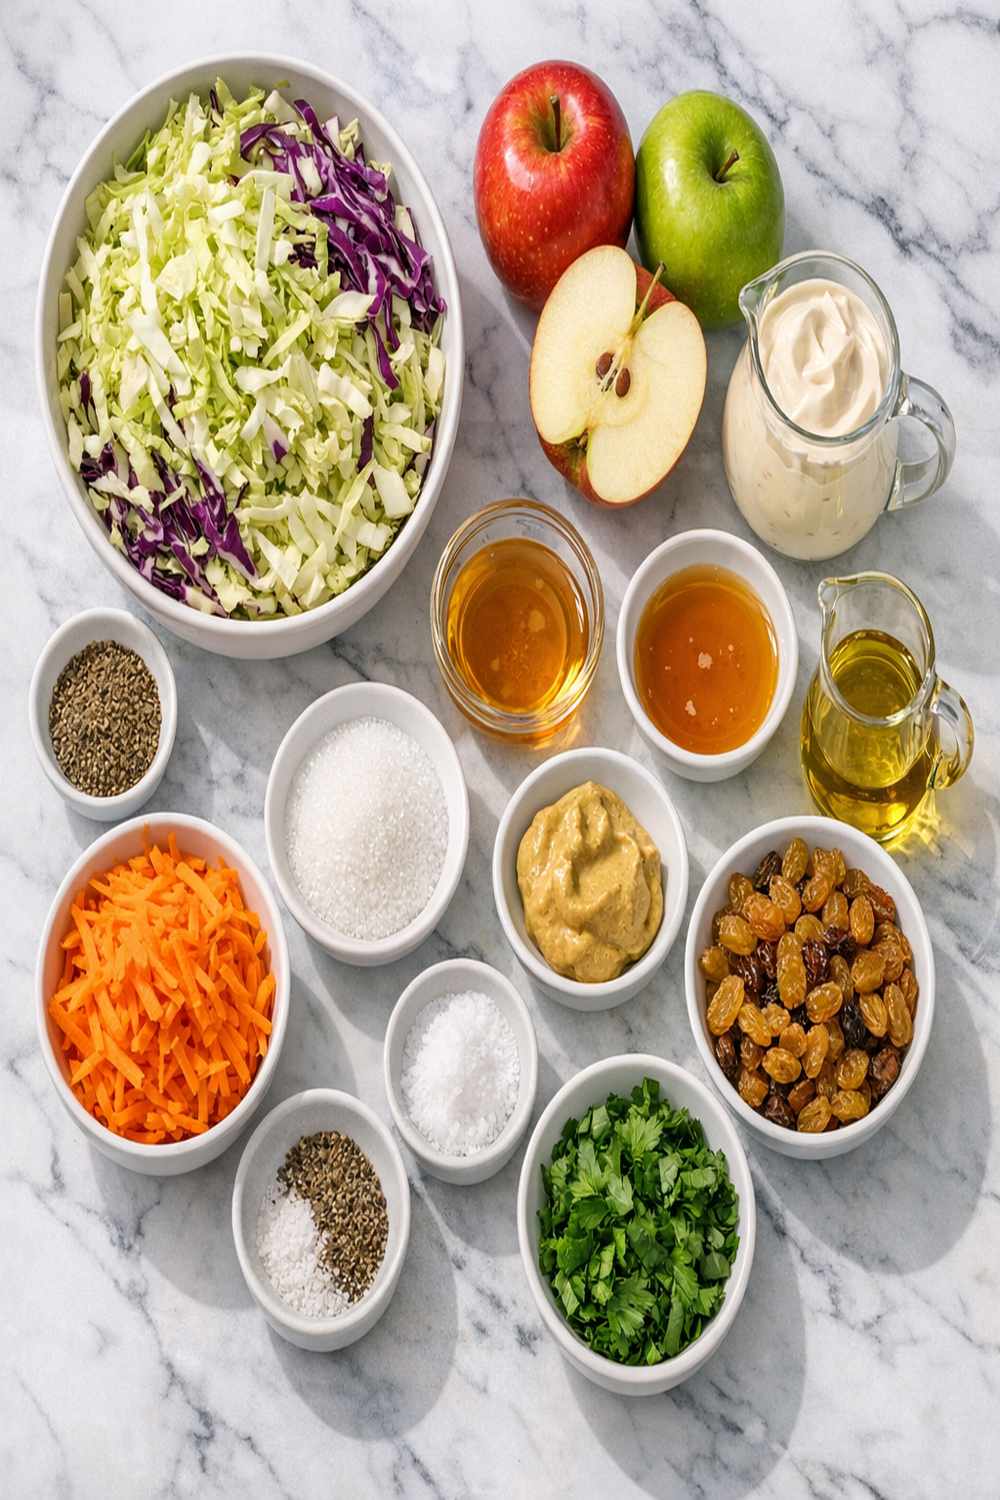
One thing I love about this recipe is how forgiving it is with ingredient sourcing. You likely have most of these items in your kitchen right now. I’ve listed exact amounts, but I also want you to feel confident making adjustments based on your preferences and what’s available to you.
- ½ teaspoon salt (kosher salt dissolves more evenly than table salt)
- ½ teaspoon celery seed (optional but recommended for authentic slaw flavor)
- 4 cups green cabbage (shredded, which is about half a medium head)
- 1 tablespoon finely minced fresh dill (optional but adds brightness and sophisticated flavor)
- 2 granny smith apples (cored and julienned or shredded, chosen for their tartness which prevents browning)
- 1 tablespoon granulated sugar (helps balance the vinegar’s acidity)
- ½ teaspoon black pepper (freshly cracked gives better flavor than pre-ground)
- 2 tablespoons apple cider vinegar (raw or filtered for maximum flavor and beneficial enzymes)
- 1 tablespoon whole grain dijon mustard (adds complexity without overpowering heat)
- 1 tablespoon fresh lemon juice (prevents the apples from oxidizing and browning)
- 1 cup shredded carrot (adds natural sweetness and beautiful color contrast)
- ½ cup mayonnaise (full-fat, as it creates better emulsion and keeps longer in refrigeration)
Yield: This recipe makes about 6 to 8 servings as a side dish, or approximately 5 cups of finished coleslaw.
How to Make Apple Coleslaw?
I’m going to walk you through this step-by-step, but I want you to know that the actual work here is minimal. The beauty of coleslaw is that it’s forgiving, and once you understand the basic technique, you can make it with your eyes closed. Here’s how I do it every single time.
Step 1: Build Your Dressing Foundation
In a small mixing bowl, combine your mayonnaise, apple cider vinegar, granulated sugar, whole grain mustard, salt, celery seed, and black pepper. Whisk everything together until you’ve created a smooth, homogeneous dressing. You should see no streaks of mayo or vinegar—everything should be completely combined and uniform in color, which typically takes about one minute of whisking. The dressing should smell bright and tangy, with a subtle mustardy undertone.

This is my favorite moment in the recipe because the dressing is where all the flavor lives. Don’t skip the whisking step. That extra minute of effort ensures the mayo emulsifies properly, which means better texture and more even flavor distribution throughout the slaw.
Step 2: Prepare Your Fresh Vegetables
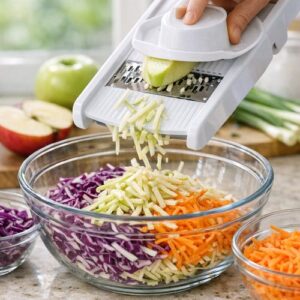
While your dressing rests, prepare your vegetables. If you have a mandoline or food processor with a shredding blade, now is the time to use it. Shred your green cabbage into thin, uniform strips—you’re aiming for pieces about the thickness of a matchstick. If you’re shredding by hand with a sharp knife, work carefully and take your time. You’ll know you’re at the right thickness when light passes through the shreds easily.

For the carrots, shred them the same way. For the apples, core them completely to remove all seeds and tough center material, then shred or julienne them into matchstick-sized pieces. This is important: as soon as you finish shredding the apples, toss them with the fresh lemon juice. This step is non-negotiable. Lemon juice prevents enzymatic browning, which is that unattractive oxidation that happens when apples are exposed to air. You want your finished slaw to look as beautiful as it tastes, and that one minute of lemon juice treatment makes all the difference.
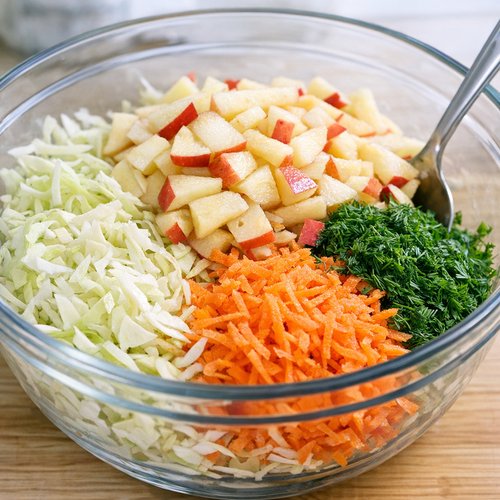
Step 3: Bring Everything Together
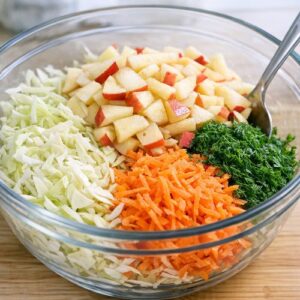
In a large mixing bowl, combine your shredded cabbage, lemon-juice-treated apples, shredded carrots, and fresh dill if you’re using it. Using a sturdy spoon or wooden spatula, toss the vegetables together gently but thoroughly. You want everything evenly distributed, but you’re not trying to bruise the cabbage.
Pour your dressing over the vegetables and toss everything together with purpose. Use the spoon to lift the vegetables from the bottom of the bowl and fold them over the top, coating everything with dressing. This should take about two minutes. You’ll know you’re done when there are no visible streaks of undressed vegetables and every piece looks glossy and coated.
Step 4: Let Time Do the Work
Cover your bowl and refrigerate for at least one hour, though I prefer to let it sit for two to three hours. This resting period is essential. What’s happening during this time is that the vinegar and salt in the dressing are gently softening the cabbage’s cell walls, making it more tender while the flavors meld together. When you taste it after one hour, you’ll notice it’s good. But after three hours? It’s transformed into something more complex and sophisticated.
Before serving, give it a gentle stir and taste. You might want to add a tiny pinch more salt or a splash more vinegar depending on your preference. This is your food—adjust it to make yourself happy.
Expert’s Nutritional Tip
As a registered dietitian, I want to highlight something specific about this recipe that most people don’t think about: the combination of raw cabbage and the acidic vinegar dressing actually increases the bioavailability of certain nutrients. The acid in vinegar helps your body absorb the calcium present in cabbage more efficiently than if you cooked the vegetables or ate them without the vinegar component.
Additionally, the whole grain mustard contributes selenium, a mineral many people don’t get enough of, while the apples provide a type of fiber called pectin that feeds beneficial bacteria in your gut. This isn’t just a delicious side dish—it’s a functional food that supports digestive health and nutrient absorption. That’s the kind of nutritional synergy I love to see in real, whole-food cooking.
Tips and Tricks
- Use a mandoline for perfectly uniform shreds – I know they require care and respect, but a mandoline creates such consistent, thin pieces that your slaw will have a more professional texture. If you use one, keep your fingertips away from that blade, and please use the safety guard. I’ve seen too many kitchen injuries, and they’re all preventable.
- Make the dressing while your vegetables chill in ice water – For extra crunch, after shredding your vegetables, submerge them in a bowl of ice water for fifteen minutes before draining well and combining with dressing. This technique plumps the cell walls and creates maximum crispness.
- Don’t skip the lemon juice on the apples – This prevents browning and adds brightness. It’s a small step that makes a visible difference in the final presentation.
- Taste and adjust before serving – Everyone’s preference for salt and vinegar varies. Before you serve, always taste a bite and add what you need. You’re the expert on your own kitchen.
- Serve it slightly cold, not directly from the freezer – The flavors shine best when the slaw is cool but not ice-cold. Take it out of the refrigerator about ten minutes before serving.
Common Mistakes to Avoid
- Shredding the apples too far in advance – If you shred them more than a few minutes before adding lemon juice, they’ll brown. Do your apple prep last, right before mixing everything together.
- Using red cabbage instead of green without adjusting expectations – Red cabbage is gorgeous, but it’s earthier and slightly more bitter than green. If you want to use it, add an extra tablespoon of sugar to balance the flavor profile.
- Skipping the resting period – I know we live in a fast-paced world, but this one hour (ideally three) genuinely transforms the texture and flavor. You can’t rush this step without sacrificing quality.
- Over-whisking the dressing – While you do need to whisk it thoroughly, excessive whisking can break the emulsion and create a separated, broken dressing. One solid minute of whisking is sufficient.
Make-Ahead Guide
As a dietitian who works with busy families, I understand the value of recipes that accommodate real life. This coleslaw is a make-ahead dream. You can prepare the dressing up to three days in advance. Store it in an airtight container in the refrigerator. The flavors actually develop and deepen, so dressing made a day ahead tastes better than dressing made fresh.
You can also shred all your vegetables the night before, store them separately in airtight containers, and combine everything with the dressing the morning of serving. The one exception is the apples—shred those no more than one hour before combining with everything else to prevent browning.
The finished coleslaw keeps beautifully for up to four days in the refrigerator. The flavors actually intensify as it sits, and the texture remains crisp because the acid in the vinegar stabilizes the vegetables. I often make a double batch on Sunday so I have slaw ready for Monday, Tuesday, and Wednesday lunches. It’s an investment of fifteen minutes that yields three days of ready-made nutrition.
Seasonal Variations
Spring Version: Replace some of the green cabbage with shredded fennel bulb and add thinly sliced fresh pea shoots. Use a mix of Granny Smith and slightly sweeter Honeycrisp apples.
Summer Version: This is the classic version exactly as written. Peak apple season is late summer through early fall, so this is when your apples will be crunchiest and most flavorful.
Fall Version: Add ¼ cup dried cranberries and increase the sugar to 1½ tablespoons. Use apples like Pink Ladies or Fujis, which have more honey-like sweetness than Granny Smiths.
Winter Version: Add ¼ cup toasted pecans or walnuts for warmth and earthiness. Consider adding a tiny pinch of cayenne pepper to the dressing for subtle heat.
Can I Store Apple Coleslaw?
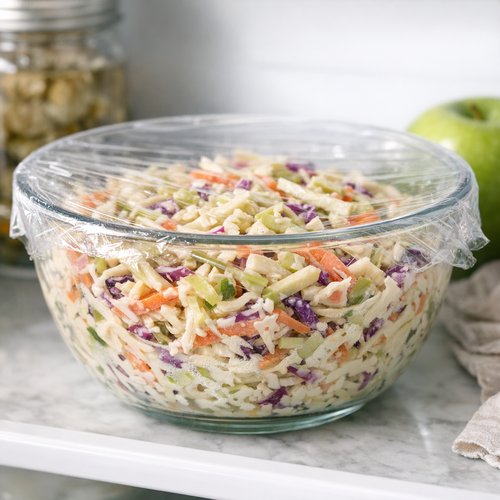
Yes, and I’d argue it actually improves with storage. The finished coleslaw keeps beautifully in an airtight container in your refrigerator for up to four days. The flavors continue to develop, and the texture remains crisp because the vinegar and salt preserve the vegetables’ structure.
After three days, the texture begins to shift slightly as the vegetables continue to soften, but the flavor only gets better. By day four, you’re starting to approach a point where it’s edible but losing its optimal crispness.
I don’t recommend freezing coleslaw. The freezing process breaks down the cell walls of the vegetables, creating a mushy texture when thawed. It’s not dangerous, but it’s not pleasant, either. Make what you’ll eat within four days.
To store it properly, transfer your finished slaw to a glass container with a tight-fitting lid. Press a piece of parchment paper directly on the surface of the slaw before sealing—this minimizes oxidation of the apples and helps preserve color and flavor. Store it toward the back of your refrigerator where it’s consistently cold.
Nutrition Information
Per serving (based on 8 servings total), this apple coleslaw contains approximately 140 calories, 11 grams of fat (mostly from the mayo), 8 grams of carbohydrates, 1.5 grams of fiber, and 0.5 grams of protein. The sodium content is approximately 280 milligrams per serving, which is reasonable and comes primarily from the salt in the dressing.
What I find most significant from a nutritional standpoint is the micronutrient density. One serving provides approximately 30% of your daily vitamin C needs, primarily from the raw cabbage and apples. The carrots contribute significant beta-carotene, which your body converts to vitamin A. The apples provide quercetin, a flavonoid with antioxidant properties, while the cabbage contains glucosinolates—compounds currently being studied for their role in cellular health.
The dressing, while containing calories from mayo, also provides fat-soluble vitamins that help your body absorb the carotenoids in the carrots. This is another example of nutritional synergy—the combination is more beneficial than the individual components.
According to USDA nutrient database standards, a half-cup serving of raw green cabbage contains approximately 11 calories and 2 grams of carbohydrates, making this a very nutrient-dense, calorie-modest side dish.
What Can I Serve With Apple Coleslaw?
This coleslaw is wonderfully versatile. I serve it alongside pulled pork, grilled chicken, fish tacos, and even burgers. It’s equally at home at a casual weeknight dinner or a summer gathering with friends.
Some of my favorite pairings include balsamic caprese chicken, which needs a bright, crisp side to balance its richness. I also love serving it with crispy breaded pork chops, where the cool crunch of the slaw provides textural contrast.
- With grilled proteins – Any grilled chicken, pork, or fish benefits from the brightness and crunch of this slaw. The acidity cuts through rich, charred flavors beautifully.
- In sandwiches and wraps – This slaw is perfect for adding to pulled pork sandwiches, turkey wraps, or even simple deli sandwiches. It adds nutrition and texture without overwhelming the other components.
- Alongside tacos – Fish tacos, pulled pork tacos, or even vegetarian tacos become more interesting with this slaw as a topping. It adds crunch and helps balance heavier fillings.
- At summer barbecues – Coleslaw is a classic barbecue side dish for a reason. It’s refreshing, holds up well in outdoor settings, and pairs with virtually every grilled item imaginable.
- On hot dogs or sausages – A generous spoonful of this slaw on a hot dog transforms it from basic to genuinely delicious.
- As a salad base – Use this as the foundation for a more substantial lunch salad. Add grilled chicken, hard-boiled eggs, or canned beans to turn it into a complete meal.
Substitutes
- Red or purple cabbage instead of green – Red cabbage is beautiful and slightly earthier. Use the same amount, but add an extra ½ tablespoon of sugar to balance the earthiness. Note that red cabbage will tint your dressing slightly purple, which is visually interesting but doesn’t affect flavor.
- Napa cabbage or savoy cabbage instead of green – Both are milder and slightly more delicate. These varieties soften more quickly, so reduce the resting time to 45 minutes rather than one hour to maintain crispness.
- Honeycrisp or Pink Lady apples instead of Granny Smith – These are sweeter varieties. If you substitute them, reduce the sugar in the dressing to 1½ teaspoons to avoid an overly sweet result.
- Greek yogurt instead of some of the mayonnaise – You can replace up to half the mayo with plain Greek yogurt to reduce calories and add protein. This creates a slightly tangier dressing. Use only plain, unsweetened yogurt.
- Rice vinegar instead of apple cider vinegar – Rice vinegar is slightly milder and more delicate. Use the same amount, but you may want to add an extra teaspoon of lemon juice to maintain brightness.
- Dijon mustard instead of whole grain – Regular yellow mustard is milder. If you prefer a smoother dressing without visible mustard seeds, this works perfectly. Use the same amount.
- Fennel seeds instead of celery seed – If you don’t have celery seed, fennel adds a subtle licorice note that’s sophisticated and slightly different. Use the same amount.
- Add shredded beets for color and earthiness – Adding ½ cup shredded raw beets transforms this into a different dish entirely, with beautiful color and earthier sweetness. This changes the character of the slaw but is genuinely delicious.
Apple Coleslaw Recipe
Ingredients
- ½ teaspoon salt kosher salt dissolves more evenly than table salt
- ½ teaspoon celery seed optional but recommended for authentic slaw flavor
- 4 cup green cabbage shredded, which is about half a medium head
- 1 tablespoon finely minced fresh dill optional but adds brightness and sophisticated flavor
- 2 granny smith apples cored and julienned or shredded, chosen for their tartness which prevents browning
- 1 tablespoon granulated sugar helps balance the vinegar's acidity
- ½ teaspoon black pepper freshly cracked gives better flavor than pre-ground
- 2 tablespoon apple cider vinegar raw or filtered for maximum flavor and beneficial enzymes
- 1 tablespoon whole grain dijon mustard adds complexity without overpowering heat
- 1 tablespoon fresh lemon juice prevents the apples from oxidizing and browning
- 1 cup shredded carrot adds natural sweetness and beautiful color contrast
- ½ cup mayonnaise full-fat, as it creates better emulsion and keeps longer in refrigeration
Instructions
Step 1: Build Your Dressing Foundation
- In a small mixing bowl, combine your mayonnaise, apple cider vinegar, granulated sugar, whole grain mustard, salt, celery seed, and black pepper. Whisk everything together until you've created a smooth, homogeneous dressing. You should see no streaks of mayo or vinegar—everything should be completely combined and uniform in color, which typically takes about one minute of whisking. The dressing should smell bright and tangy, with a subtle mustardy undertone. This is my favorite moment in the recipe because the dressing is where all the flavor lives. Don't skip the whisking step. That extra minute of effort ensures the mayo emulsifies properly, which means better texture and more even flavor distribution throughout the slaw.

Step 2: Prepare Your Fresh Vegetables
- While your dressing rests, prepare your vegetables. If you have a mandoline or food processor with a shredding blade, now is the time to use it. Shred your green cabbage into thin, uniform strips—you're aiming for pieces about the thickness of a matchstick. If you're shredding by hand with a sharp knife, work carefully and take your time. You'll know you're at the right thickness when light passes through the shreds easily. For the carrots, shred them the same way. For the apples, core them completely to remove all seeds and tough center material, then shred or julienne them into matchstick-sized pieces. This is important: as soon as you finish shredding the apples, toss them with the fresh lemon juice. This step is non-negotiable. Lemon juice prevents enzymatic browning, which is that unattractive oxidation that happens when apples are exposed to air. You want your finished slaw to look as beautiful as it tastes, and that one minute of lemon juice treatment makes all the difference.
Step 3: Bring Everything Together
- In a large mixing bowl, combine your shredded cabbage, lemon-juice-treated apples, shredded carrots, and fresh dill if you're using it. Using a sturdy spoon or wooden spatula, toss the vegetables together gently but thoroughly. You want everything evenly distributed, but you're not trying to bruise the cabbage. Pour your dressing over the vegetables and toss everything together with purpose. Use the spoon to lift the vegetables from the bottom of the bowl and fold them over the top, coating everything with dressing. This should take about two minutes. You'll know you're done when there are no visible streaks of undressed vegetables and every piece looks glossy and coated.
Step 4: Let Time Do the Work
- Cover your bowl and refrigerate for at least one hour, though I prefer to let it sit for two to three hours. This resting period is essential. What's happening during this time is that the vinegar and salt in the dressing are gently softening the cabbage's cell walls, making it more tender while the flavors meld together. When you taste it after one hour, you'll notice it's good. But after three hours? It's transformed into something more complex and sophisticated. Before serving, give it a gentle stir and taste. You might want to add a tiny pinch more salt or a splash more vinegar depending on your preference. This is your food—adjust it to make yourself happy.

Notes
Nutrition
FAQs
Can I make this coleslaw without mayonnaise?
You absolutely can. Replace the mayo with an equal amount of Greek yogurt or sour cream for a tangier dressing, or use olive oil combined with a bit more vinegar for an oil-and-vinegar approach. The texture and mouthfeel will be different—less creamy, more vinaigrette-like—but it will still be delicious. If using olive oil, start with ¼ cup and add more as needed until you reach your preferred consistency. Some people actually prefer the lighter, brighter version without mayo, so don’t hesitate to experiment.
Why does my coleslaw get watery after a day?
This happens when vegetables release their water as the salt and acid break down their cell walls. While some liquid is normal, excess water suggests you either used too much salt or didn’t drain your vegetables well enough before combining with dressing. If your finished slaw becomes watery, you can drain some liquid before serving. For future batches, ensure you’re measuring salt accurately (use a measuring spoon, not a pinch), and pat your shredded vegetables with paper towels to remove excess moisture before combining with dressing.
Can I make this coleslaw ahead for a party?
Yes, and I actually recommend it. Make it up to three days in advance. The flavors develop beautifully over time. Store it in an airtight container in the coldest part of your refrigerator. Give it a gentle stir about an hour before serving to distribute any liquid that may have accumulated at the bottom. Taste it and add a tiny pinch of salt if needed before serving, as flavors can become muted after extended storage.
What’s the difference between coleslaw and slaw?
These terms are used interchangeably, so they mean the same thing. “Coleslaw” comes from the Dutch word “koolsla,” which literally means “cabbage salad.” Over time, the term shortened to “slaw.” So when someone says slaw, they’re referring to cabbage-based salad. This specific recipe is apple coleslaw because the primary flavor accent is apple rather than vinegar alone or another ingredient.
How long does this take to make from start to finish?
Active prep time is approximately fifteen minutes—five minutes to prepare the dressing and ten minutes to shred vegetables and combine everything. Then you need to let it rest at least one hour (I prefer three hours) before serving. Total time from opening your refrigerator to eating is therefore a minimum of one hour and fifteen minutes, or about three hours and fifteen minutes if you do the full resting period. This makes it perfect for meal prep or making the night before.
More Recipes You’ll Love
- Baked Yellow Potato Recipe – Creamy roasted potatoes make a hearty companion to crisp, bright coleslaw
- Baked Cod With Mayonnaise Recipe – Delicate white fish pairs beautifully with the bright acidity of this apple slaw
- Grilled Crab Legs – Luxurious seafood becomes even more special when served alongside crisp, fresh coleslaw
Final Thoughts
I keep coming back to what my grandmother told me all those years ago about side dishes and memory. This apple coleslaw has become part of my family’s regular rotation because it does exactly what great food should do—it brings people together and makes them happy.
As a registered dietitian, I also appreciate that this recipe refuses to separate nutrition from joy. Your family gets to enjoy something genuinely delicious while also nourishing their bodies with raw vegetables, beneficial fiber, and micronutrients that support real health. That’s the kind of cooking I believe in—food that loves you back.
The beauty of this recipe is that once you make it once, you’ll understand the technique deeply enough to adapt it to whatever you have on hand. Different apples? Try it. Prefer less mayo? Go for it. Want to add herbs? Add them. This is a template for thinking about slaw, not a rigid set of rules.
I’d love for you to make this this week and discover what my family already knows—that sometimes the best dishes are the ones we overlook. Coleslaw doesn’t have to be boring. It can be vibrant, crunchy, balanced, and absolutely delicious. Happy cooking!
