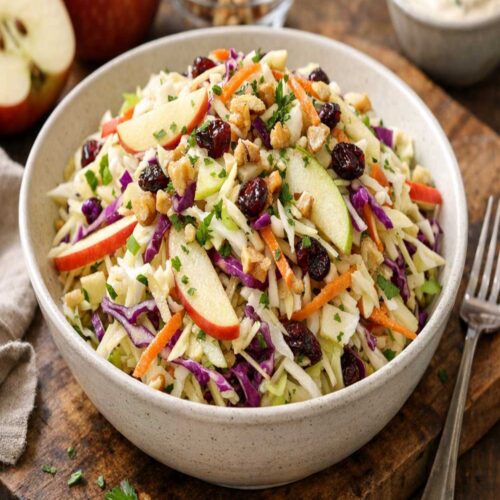
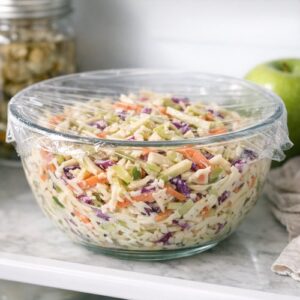
Apple Coleslaw Recipe
This apple coleslaw is my secret weapon for bringing fresh, crunchy life to any meal. It pairs beautifully with pulled pork sandwiches, grilled chicken, and even hearty barbeque chicken wraps. I love how a simple slaw can transform an ordinary dinner into something your family actually gets excited about.
Ingredients
- ½ teaspoon salt kosher salt dissolves more evenly than table salt
- ½ teaspoon celery seed optional but recommended for authentic slaw flavor
- 4 cup green cabbage shredded, which is about half a medium head
- 1 tablespoon finely minced fresh dill optional but adds brightness and sophisticated flavor
- 2 granny smith apples cored and julienned or shredded, chosen for their tartness which prevents browning
- 1 tablespoon granulated sugar helps balance the vinegar's acidity
- ½ teaspoon black pepper freshly cracked gives better flavor than pre-ground
- 2 tablespoon apple cider vinegar raw or filtered for maximum flavor and beneficial enzymes
- 1 tablespoon whole grain dijon mustard adds complexity without overpowering heat
- 1 tablespoon fresh lemon juice prevents the apples from oxidizing and browning
- 1 cup shredded carrot adds natural sweetness and beautiful color contrast
- ½ cup mayonnaise full-fat, as it creates better emulsion and keeps longer in refrigeration
Instructions
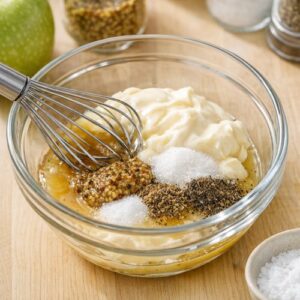
Step 1: Build Your Dressing Foundation
- In a small mixing bowl, combine your mayonnaise, apple cider vinegar, granulated sugar, whole grain mustard, salt, celery seed, and black pepper. Whisk everything together until you've created a smooth, homogeneous dressing. You should see no streaks of mayo or vinegar—everything should be completely combined and uniform in color, which typically takes about one minute of whisking. The dressing should smell bright and tangy, with a subtle mustardy undertone. This is my favorite moment in the recipe because the dressing is where all the flavor lives. Don't skip the whisking step. That extra minute of effort ensures the mayo emulsifies properly, which means better texture and more even flavor distribution throughout the slaw.
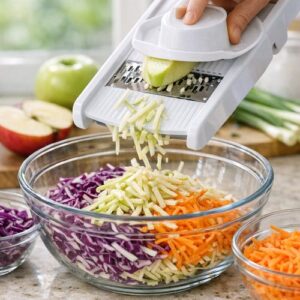
Step 2: Prepare Your Fresh Vegetables
- While your dressing rests, prepare your vegetables. If you have a mandoline or food processor with a shredding blade, now is the time to use it. Shred your green cabbage into thin, uniform strips—you're aiming for pieces about the thickness of a matchstick. If you're shredding by hand with a sharp knife, work carefully and take your time. You'll know you're at the right thickness when light passes through the shreds easily. For the carrots, shred them the same way. For the apples, core them completely to remove all seeds and tough center material, then shred or julienne them into matchstick-sized pieces. This is important: as soon as you finish shredding the apples, toss them with the fresh lemon juice. This step is non-negotiable. Lemon juice prevents enzymatic browning, which is that unattractive oxidation that happens when apples are exposed to air. You want your finished slaw to look as beautiful as it tastes, and that one minute of lemon juice treatment makes all the difference.
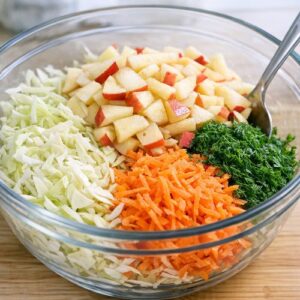
Step 3: Bring Everything Together
- In a large mixing bowl, combine your shredded cabbage, lemon-juice-treated apples, shredded carrots, and fresh dill if you're using it. Using a sturdy spoon or wooden spatula, toss the vegetables together gently but thoroughly. You want everything evenly distributed, but you're not trying to bruise the cabbage. Pour your dressing over the vegetables and toss everything together with purpose. Use the spoon to lift the vegetables from the bottom of the bowl and fold them over the top, coating everything with dressing. This should take about two minutes. You'll know you're done when there are no visible streaks of undressed vegetables and every piece looks glossy and coated.
Step 4: Let Time Do the Work
- Cover your bowl and refrigerate for at least one hour, though I prefer to let it sit for two to three hours. This resting period is essential. What's happening during this time is that the vinegar and salt in the dressing are gently softening the cabbage's cell walls, making it more tender while the flavors meld together. When you taste it after one hour, you'll notice it's good. But after three hours? It's transformed into something more complex and sophisticated. Before serving, give it a gentle stir and taste. You might want to add a tiny pinch more salt or a splash more vinegar depending on your preference. This is your food—adjust it to make yourself happy.
Notes
- Use a mandoline for perfectly uniform shreds - I know they require care and respect, but a mandoline creates such consistent, thin pieces that your slaw will have a more professional texture. If you use one, keep your fingertips away from that blade, and please use the safety guard. I've seen too many kitchen injuries, and they're all preventable.
- Make the dressing while your vegetables chill in ice water - For extra crunch, after shredding your vegetables, submerge them in a bowl of ice water for fifteen minutes before draining well and combining with dressing. This technique plumps the cell walls and creates maximum crispness.
- Don't skip the lemon juice on the apples - This prevents browning and adds brightness. It's a small step that makes a visible difference in the final presentation.
- Taste and adjust before serving - Everyone's preference for salt and vinegar varies. Before you serve, always taste a bite and add what you need. You're the expert on your own kitchen.
- Serve it slightly cold, not directly from the freezer - The flavors shine best when the slaw is cool but not ice-cold. Take it out of the refrigerator about ten minutes before serving.
Nutrition
Calories: 142kcalCarbohydrates: 11gFat: 10gSaturated Fat: 1gCholesterol: 5mgSodium: 273mgFiber: 2gSugar: 8g
Tried this recipe?Let us know how it was!