Before diving into the details of the Ed Smith Cherry Pie recipe, let’s talk about accompaniments. A slice of cherry pie can be a delightful experience on its own, yet pairing can elevate it to another level altogether. Consider serving it with a scoop of vanilla ice cream. The creamy texture can complement the tartness of the cherries beautifully.
Another great option is a dollop of freshly whipped cream. It adds richness and balances the sweetness perfectly. For a twist, try drizzling some chocolate sauce over the pie. This might sound unconventional, but the chocolate and cherries are a match made in dessert heaven.
Now, if you’re feeling a bit adventurous, how about pairing your slice with a fruity yogurt? Think cherry or mixed berry flavors. The tanginess keeps things light and refreshing.
Let me tell you, this pie doesn’t have to sit alone on the plate. It’s ready to shine alongside an ensemble of flavors that can take your dessert experience to new heights.

Cherry pie is one of those desserts that bring back memories. The sweet and tangy flavor combined with a flaky crust can transport you to simpler times. When I think of cherry pie, I recall countless summer gatherings where this pie was the star of the dessert table.
One recipe that always stood out to me is the Ed Smith Cherry Pie recipe. It’s straightforward, attainable, and has a rich history behind it. This pie does more than satisfy a sweet tooth; it weaves stories among friends and family. Whether it’s a summer barbecue or a holiday feast, the pie never fails to impress.
But what makes the Ed Smith Cherry Pie special? That’s what we’re about to find out.
What is the Ed Smith Cherry Pie?
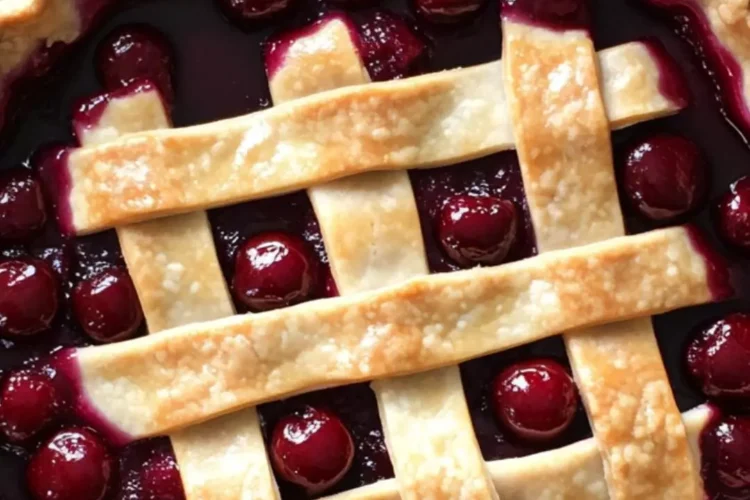
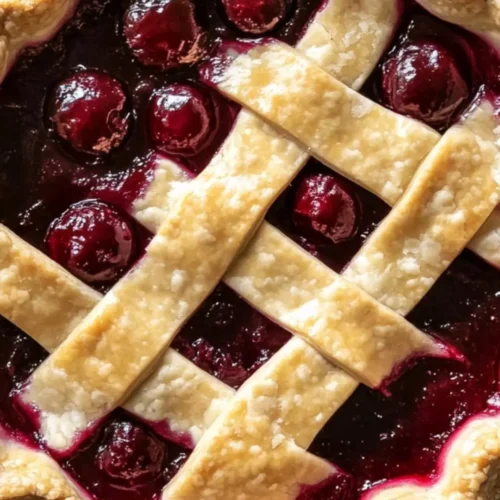
The Ed Smith Cherry Pie recipe is a classic approach to making a cherry pie using E.D.SMITH® Cherry Pie Filling, widely recognized for its quality and flavor. This pie is characterized by its delicious, tart fillings and a buttery, flaky crust.
What sets this recipe apart is its simplicity. It doesn’t require complicated techniques or hard-to-find ingredients. Instead, it emphasizes using quality components to achieve a delicious final product.
I was drawn to this recipe because it’s perfect for busy individuals. With minimal prep time, you too can whip up a homemade cherry pie that will have everyone asking, “Who made this?”
What Makes This Recipe Different from Other Ed Smith Cherry Pie Recipes?
The uniqueness of this recipe lies in its practicality. While some cherry pie recipes may require you to pit fresh cherries or spend hours preparing a homemade filling, this one cuts through all that. The use of E.D.SMITH® Cherry Pie Filling simplifies the process. This time-saver allows you to focus on creating a lovely crust and savoring the delightful cherry flavor.
In addition, the balance of flavors and ingredients is spot on. The hint of lemon zest and vanilla extract enhances the cherries’ natural flavor without overpowering them. Trust me; that little twist adds a gourmet touch to an otherwise simple dessert.
How Does It Taste?
If you’ve never experienced the flavor of an Ed Smith Cherry Pie, you’re in for a treat. The pie delivers a delicious balance of tartness and sweetness. The crust is buttery and flaky, providing a perfect counterpoint to the rich filling inside.
Each bite offers a delightful burst of cherries that make your taste buds dance. You might even find yourself going back for a second slice before you realize it!
Ingredients You’ll Need to Make This Dish
To embark on this cherry pie adventure, you’ll need the following ingredients:
- 1 cup (250 mL) chilled unsalted butter, diced into small cubes
- ½ cup (125 mL) ice-cold water
- 2 ½ cups (625 mL) all-purpose flour
- 1 teaspoon (5 mL) sea salt
- 1 teaspoon (5 mL) fine granulated sugar
- 1 can (540 mL) E.D.SMITH® Cherry Pie Filling
- 1 tablespoon (15 mL) lemon zest
- 1 teaspoon (5 mL) vanilla extract
Having these ingredients on hand means you’re almost ready to bring that delightful pie to life.

Step by Step Instructions
Making an Ed Smith Cherry Pie is accessible for anyone, regardless of experience. Here’s a detailed guide to help you through each phase of the process:
Step 1: Make the Pie Crust
Begin by mixing the flour, sea salt, and sugar in a large bowl. It’s essential to blend these dry ingredients well for even flavor.
Step 2: Cut in the Butter
Next, add the chilled, diced butter to the flour mixture. Using a pastry cutter or your fingers, work the butter into the flour until it resembles coarse crumbs. Don’t worry if there are some larger chunks remaining; they’ll create nice flaky layers in your crust.
Step 3: Add the Ice-Cold Water
Slowly add the ice-cold water to the mixture, a tablespoon at a time. Stir gently with a fork until the dough begins to come together. You’re looking for a consistency that holds together but isn’t sticky.
Step 4: Chill the Dough
Once you’ve formed the dough, wrap it tightly in plastic wrap and refrigerate for at least one hour. This resting period allows the gluten to relax, which makes rolling out the dough much easier.
Step 5: Preheat the Oven
While the dough chills, preheat your oven to 425°F (220°C). Getting your oven ready in advance helps achieve that golden-brown crust we all love.
Step 6: Roll Out the Dough
After the dough has chilled, divide it into two halves. Roll out one half on a lightly floured surface until it’s about ¼ inch thick. This will be your bottom crust.
Step 7: Prepare the Pie Dish
Carefully transfer the rolled-out dough into a 9-inch pie dish. Trim any excess hanging over the edges, but leave enough to crimp the edges later.
Step 8: Fill the Pie
Open your can of E.D.SMITH® Cherry Pie Filling. Pour it into the pie crust, spreading it evenly. Sprinkle the lemon zest and vanilla extract over the filling. This extra touch will enhance the flavor tremendously.
Step 9: Roll Out the Top Crust
Now, repeat the rolling process with the second half of your dough. Place it on top of the filled pie. You can make slits in the crust for a decorative touch and allow steam to escape.
Step 10: Crimp the Edges
Press the edges of the top and bottom crusts together to seal the pie. Use your fingers or a fork to create a decorative edge if you’re feeling fancy.
Step 11: Bake the Pie
Place your pie in the preheated oven and bake for 15 minutes. After that, reduce the temperature to 350°F (175°C) and continue baking for another 30 to 35 minutes. Look for a golden-brown crust and bubbling cherry filling.
Step 12: Cool and Serve
Once baked to perfection, take it out and let the pie cool for at least 30 minutes, allowing the filling to set. Serve with your choice of ice cream, whipped cream, or simply on its own.
Tips & Tricks on Making Ed Smith Cherry Pie
Creating the perfect cherry pie can be an art. Here are some tips to help you succeed:
- Use Cold Ingredients: Keep your butter and water extra cold. This will ensure your crust remains flaky.
- Don’t Overwork the Dough: Mix just until combined. Overworking will make the crust tough.
- Experiment with Flavor: Add a pinch of cinnamon or almond extract to the filling for extra depth in flavor.
- Let It Cool: Allowing the pie to cool before slicing will help the filling firm up and makes for a cleaner slice.
- Cover Edges: If the edges of the crust brown too quickly, cover them with foil for the last part of baking.

Nutrition Information

How Do I Store This Dish?
Proper storage is crucial to keep your pie delicious:
- At Room Temperature: If consumed within 1-2 days, you can keep it covered at room temperature.
- Refrigerator: If you have leftover pie, store it in the refrigerator in an airtight container. It’ll remain fresh for about 4-5 days.
- Freezer: To freeze, wrap slices tightly in plastic wrap and then in aluminum foil. It will last for up to 3 months. Thaw in the refrigerator before serving.
What Other Substitutes Can You Use in Ed Smith Cherry Pie Recipe?
If cherries aren’t your thing or you’re looking for alternatives, here are some great substitutions:
- Blueberries: Use a can or fresh blueberries for a vibrant variation. They provide a slightly sweet, juicy experience.
- Peach Filling: Swap in peach filling for a different flavor profile. Peaches offer a subtle sweetness that pairs well with the buttery crust.
- Mixed Berry Filling: Combine various berries for a medley of flavors. This works well if you enjoy a mix of tart and sweet.
- Apple Filling: Substitute with apple pie filling for a more traditional option. It adds warmth and comfort to your dessert.
- Raspberry Filling: Raspberry filling adds a beautiful color and a tart punch. It’s a unique take that cherry enthusiasts may enjoy.
Ed Smith Cherry Pie Recipe
Equipment
- Large bowl
- Plastic wrap
Ingredients
- 1 cup 250 mL chilled unsalted butter, diced into small cubes
- ½ cup 125 mL ice-cold water
- 2 ½ cups 625 mL all-purpose flour
- 1 teaspoon 5 mL sea salt
- 1 teaspoon 5 mL fine granulated sugar
- 1 can 540 mL E.D.SMITH® Cherry Pie Filling
- 1 tablespoon 15 mL lemon zest
- 1 teaspoon 5 mL vanilla extract
Instructions
- Begin by mixing the flour, sea salt, and sugar in a large bowl. It’s essential to blend these dry ingredients well for even flavor.
- Next, add the chilled, diced butter to the flour mixture. Using a pastry cutter or your fingers, work the butter into the flour until it resembles coarse crumbs. Don’t worry if there are some larger chunks remaining; they’ll create nice flaky layers in your crust.
- Slowly add the ice-cold water to the mixture, a tablespoon at a time. Stir gently with a fork until the dough begins to come together. You’re looking for a consistency that holds together but isn’t sticky.
- Once you’ve formed the dough, wrap it tightly in plastic wrap and refrigerate for at least one hour. This resting period allows the gluten to relax, which makes rolling out the dough much easier.
- While the dough chills, preheat your oven to 425°F (220°C). Getting your oven ready in advance helps achieve that golden-brown crust we all love.
- After the dough has chilled, divide it into two halves. Roll out one half on a lightly floured surface until it’s about ¼ inch thick. This will be your bottom crust.
- Carefully transfer the rolled-out dough into a 9-inch pie dish. Trim any excess hanging over the edges, but leave enough to crimp the edges later.
- Open your can of E.D.SMITH® Cherry Pie Filling. Pour it into the pie crust, spreading it evenly. Sprinkle the lemon zest and vanilla extract over the filling. This extra touch will enhance the flavor tremendously.
- Now, repeat the rolling process with the second half of your dough. Place it on top of the filled pie. You can make slits in the crust for a decorative touch and allow steam to escape.
- Press the edges of the top and bottom crusts together to seal the pie. Use your fingers or a fork to create a decorative edge if you’re feeling fancy.
- Place your pie in the preheated oven and bake for 15 minutes. After that, reduce the temperature to 350°F (175°C) and continue baking for another 30 to 35 minutes. Look for a golden-brown crust and bubbling cherry filling.
- Once baked to perfection, take it out and let the pie cool for at least 30 minutes, allowing the filling to set. Serve with your choice of ice cream, whipped cream, or simply on its own.
Notes
- Use Cold Ingredients: Keep your butter and water extra cold. This will ensure your crust remains flaky.
- Don’t Overwork the Dough: Mix just until combined. Overworking will make the crust tough.
- Experiment with Flavor: Add a pinch of cinnamon or almond extract to the filling for extra depth in flavor.
- Let It Cool: Allowing the pie to cool before slicing will help the filling firm up and makes for a cleaner slice.
- Cover Edges: If the edges of the crust brown too quickly, cover them with foil for the last part of baking.
Nutrition
Frequently Asked Questions
Conclusion
Making an Ed Smith Cherry Pie is not just about following a recipe; it’s about creating memories that can be shared with family and friends. The wholesome sweetness of the cherries, along with the flaky crust, can genuinely bring joy to any occasion.
Through this detailed guide, I encourage you to embrace the joy of baking. Whether you’re an experienced baker or just getting started, this cherry pie recipe is forgiving and delightful. With a few simple tips, you can create a beautiful dessert to impress anyone lucky enough to get a slice.
Now, go ahead, roll up your sleeves, and give this pie a try. Your taste buds will bring you back, slice after slice, to those cherished moments. Happy baking!
