It’s a sunny afternoon, and you have a craving for crispy, golden onion rings. You know the kind I’m talking about—those perfectly battered, crunchy delicacies from Arby’s. If you’re anything like me, you’ve experienced that flavorful crunch, and thought, “I need to recreate that at home!” Well, let me tell you, you’re in for a treat.

What is Arby’s Onion Rings?
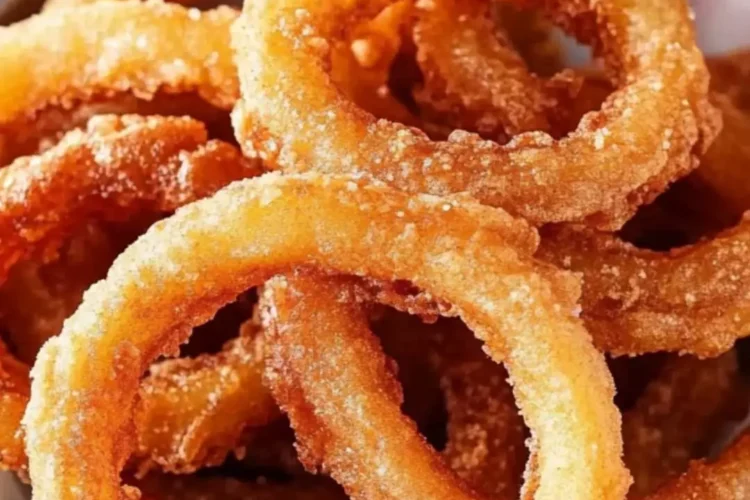
Arby’s onion rings stand as a testament to the perfect balance of crispy exteriors and tender, sweet onion centers. Each ring is a delightful experience—a warm bite that takes you on a flavor journey.
What makes them special is their unique batter, which clings just right and crisps beautifully when fried. My goal today is to demystify the process behind this mouthwatering dish so you can enjoy them whenever you have a craving.
Why You’ll Love This Arby’s Onion Rings
Let’s be honest. Who doesn’t love a good onion ring? They’re the perfect side dish, snack, or comfort food. When you master this recipe, you’ll have a newfound power: the ability to make these delicious rings in the comfort of your own kitchen. Imagine serving them at a gathering or enjoying them during a cozy movie night. Not to mention, they’re surprisingly easy to make, even for those who might not consider themselves kitchen wizards.
The Ingredients
Now, let’s gather the magic ingredients that’ll help us whip up this delectable dish. Here’s what you’ll need:

- 2 cups all-purpose flour
- 2 cups golden cornmeal
- 2 cups crushed savory cracker crumbs
- 2 Vidalia onions or 1015 sweet onions, cut into rings
- 2 cups tangy buttermilk
- 1 cup cold water
- Vegetable oil, for frying
- 1 teaspoon smoked paprika
- 1 teaspoon garlic powder
Each ingredient plays a role. The flour provides the base, while cornmeal adds texture and crunch. The cracker crumbs contribute a savory depth, and the buttermilk brings a tangy flavor that’s hard to resist. Let’s dive into the process.

Step-by-Step Instructions
Step 1: Slice the Onions
Begin by taking your Vidalia or 1015 onions. Use a sharp knife for this to make clean cuts. Slice each onion into rings about half an inch thick. This thickness will ensure that you achieve that ideal balance between a crispy exterior and a soft interior. Once you have your rings sliced, set them aside in a large bowl.

Step 2: Prepare the Buttermilk Mixture
In a separate bowl, combine the buttermilk and cold water. Whisk it together until smooth. This creamy mix will help the flour and other dry ingredients adhere to the onion rings. What I love about using buttermilk is how it enhances the flavor while keeping the rings tender.
Step 3: Create the Dry Mix
In another bowl, mix together the flour, cornmeal, cracker crumbs, smoked paprika, and garlic powder. Each ingredient adds a unique layer to your batter. Smoked paprika will give that hint of smokiness, while garlic powder adds a wonderful fragrance. Mix until well combined.

Step 4: Batter the Onion Rings
Take each onion ring and dip it first into the buttermilk mixture, making sure it’s coated. Then, toss it into the dry mix, ensuring an even coating. Repeat this process for all the onion rings. Double-dipping can enhance the crunch, so don’t be shy about getting those rings nice and coated!
Step 5: Heat the Oil
In a deep frying pan or large pot, pour in enough vegetable oil to submerge the onion rings—about three inches deep. Heat the oil over medium-high heat until it reaches 350°F (use a thermometer for accuracy). It’s crucial to get the temperature just right so that the onion rings fry up perfectly golden without soaking up too much oil.

Step 6: Fry the Onion Rings
Once your oil is hot, carefully place a few battered onion rings into the pot. Don’t overcrowd the skillet, as this can reduce the temperature of the oil and lead to soggy rings. Fry them for about 2-3 minutes on each side or until they reach that irresistible golden brown. Use a slotted spoon to remove them and let them drain on paper towels.

Step 7: Repeat
Repeat the frying process with the remaining onion rings. It may take a little time, but trust me—the results are worth it. You’ll feel a sense of accomplishment as each batch comes out crispy and beautiful.

Tips & Tricks
Here are five tips to ensure your onion rings turn out perfectly:
- Choose the Right Onions: Sweet onions like Vidalia or 1015 are ideal for this recipe because they balance beautifully with the savory batter.
- Keep Everything Cold: Cold buttermilk and cold water help the batter adhere better, leading to a crunchier coating.
- Temperature Control: Maintain the oil temperature at around 350°F. Too hot, and it will burn. Too cold, and the rings will absorb oil.
- Rotation in Batching: Frying in small batches keeps temperature consistent and ensures each ring gets equal attention for the best frying.
- Experiment with Spices: Feel free to add other spices to the batter to customize the flavor. Chili powder, onion powder, or even cayenne for a kick can elevate your rings.

Nutrition Information
arby’s onion rings recipe nutrition facts

Can I Store Arby’s Onion Rings?
Absolutely! These rings can be stored in the fridge for up to three days. When reheating, use an oven or air fryer to restore their crispy texture. That said, you won’t want to keep them around for long—they’re too delicious!
What Can I Serve with Arby’s Onion Rings?
Onion rings can be a fantastic side to many dishes. Here are a few ideas:
- Burgers: They pair wonderfully with any burger, be it beef, turkey, or black bean.
- Sandwiches: Try them alongside your favorite deli or sub sandwich for a special crunch.
- Salads: Serve them over a bed of greens for an unexpected twist.
- Dips: A side of ranch, barbecue sauce, or spicy aioli for dipping elevates the experience.
- Wraps: Add them to wraps for that extra crunch factor.
Variations
The beauty of this recipe is its versatility. Here are some variations you can try:
- Spicy Onion Rings: Add cayenne pepper to the batter for an extra kick.
- Cheesy Rings: Incorporate grated parmesan cheese into the dry mix for a cheesy flavor.
- Beer Battered Rings: Substitute buttermilk with a light lager for a different flavor profile.
- Herb-Infused: Mix in dried herbs like oregano and parsley to the batter for an herby undertone.
- Gluten-Free Option: Use gluten-free flour in place of regular flour to accommodate dietary needs.
Arby’s Onion Rings Recipe
Equipment
- Large bowl
- Separate bowl
Ingredients
- 2 cups all-purpose flour
- 2 cups golden cornmeal
- 2 cups crushed savory cracker crumbs
- 2 Vidalia onions or 1015 sweet onions cut into rings
- 2 cups tangy buttermilk
- 1 cup cold water
- Vegetable oil for frying
- 1 teaspoon smoked paprika
- 1 teaspoon garlic powder
Instructions
- Begin by taking your Vidalia or 1015 onions. Use a sharp knife for this to make clean cuts. Slice each onion into rings about half an inch thick. This thickness will ensure that you achieve that ideal balance between a crispy exterior and a soft interior. Once you have your rings sliced, set them aside in a large bowl.
- In a separate bowl, combine the buttermilk and cold water. Whisk it together until smooth. This creamy mix will help the flour and other dry ingredients adhere to the onion rings. What I love about using buttermilk is how it enhances the flavor while keeping the rings tender.
- In another bowl, mix together the flour, cornmeal, cracker crumbs, smoked paprika, and garlic powder. Each ingredient adds a unique layer to your batter. Smoked paprika will give that hint of smokiness, while garlic powder adds a wonderful fragrance. Mix until well combined.
- Take each onion ring and dip it first into the buttermilk mixture, making sure it’s coated. Then, toss it into the dry mix, ensuring an even coating. Repeat this process for all the onion rings. Double-dipping can enhance the crunch, so don’t be shy about getting those rings nice and coated!
- In a deep frying pan or large pot, pour in enough vegetable oil to submerge the onion rings—about three inches deep. Heat the oil over medium-high heat until it reaches 350°F (use a thermometer for accuracy). It’s crucial to get the temperature just right so that the onion rings fry up perfectly golden without soaking up too much oil.
- Once your oil is hot, carefully place a few battered onion rings into the pot. Don’t overcrowd the skillet, as this can reduce the temperature of the oil and lead to soggy rings. Fry them for about 2-3 minutes on each side or until they reach that irresistible golden brown. Use a slotted spoon to remove them and let them drain on paper towels.
- Repeat the frying process with the remaining onion rings. It may take a little time, but trust me—the results are worth it. You’ll feel a sense of accomplishment as each batch comes out crispy and beautiful.
Video
Notes
- Choose the Right Onions: Sweet onions like Vidalia or 1015 are ideal for this recipe because they balance beautifully with the savory batter.
- Keep Everything Cold: Cold buttermilk and cold water help the batter adhere better, leading to a crunchier coating.
- Temperature Control: Maintain the oil temperature at around 350°F. Too hot, and it will burn. Too cold, and the rings will absorb oil.
- Rotation in Batching: Frying in small batches keeps temperature consistent and ensures each ring gets equal attention for the best frying.
- Experiment with Spices: Feel free to add other spices to the batter to customize the flavor. Chili powder, onion powder, or even cayenne for a kick can elevate your rings.
Nutrition
Frequently Asked Questions
Conclusion
Now that you know the ins and outs of making Arby’s-style onion rings at home, it’s time to get cooking! This recipe allows you to enjoy a fast-food favorite right in your kitchen, with the added satisfaction of quality and taste.
Whether you’re serving them at a gathering, as a side to a burger, or just enjoying them on a movie night, these onion rings are sure to please. In the words of anyone who’s tasted them: “Wow, these are just like Arby’s!” Now, go on and impress your taste buds and those around you with this crispy delight!
