A drizzle of rich garlic aioli over crispy fries, a creamy layer on a beef sandwich, or a dip for fresh vegetables on a sweltering summer day. You could slather it on a home-grilled burger or even mix it into a pasta salad for that extra kick.
The versatility of Arby’s garlic aioli is endless. It complements savory dishes while enhancing flavors. Trust me, your taste buds will throw a party!

I still remember the first time I tried Arby’s garlic aioli. Let me tell you, it was love at first bite. The creamy, garlicky goodness shook up everything I thought I knew about condiments. Not just for dipping, this flavorful concoction transformed ordinary meals into gourmet experiences.
Being a registered dietitian and food blogger, I immediately started dissecting the ingredients and flavor profile. Why did it taste so heavenly? What made it work? Today, I’ll guide you on how to recreate that magic in your kitchen. By the end of this journey, you’ll be ready to whip up your own batch of garlic aioli goodness!
What is Arby’s Garlic Aioli?
At its core, garlic aioli is a fancy term for a garlic-flavored mayo. Originally from the Mediterranean, aioli combines garlic with olive oil. However, Arby’s version adds a creamy twist. They blend mayonnaise with roasted garlic and a few other key ingredients to create a sauce that is flavorful and versatile. It is a delightful upgrade to your usual ketchup or mustard.
What Does It Taste Like?
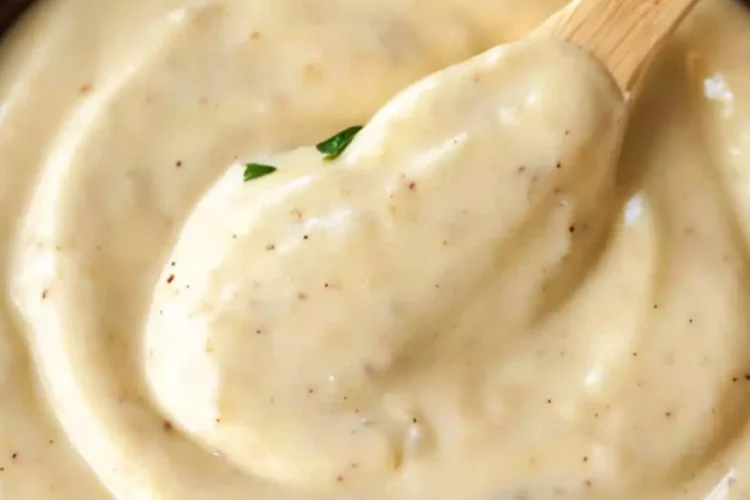
The taste is a perfect balance of creamy and tangy. The garlic packs a punch, making it rich but not overpowering. Each dip or spread heightens the dish it accompanies. The blend of ingredients highlights the smokiness of paprika, the warmth of Worcestershire sauce, and the freshness of lemon juice. Simply put, it’s a flavor fiesta.
Why This Recipe Works?
Here are some compelling reasons why making this garlic aioli recipe is worth your time:
1. Quick to Prepare
You can whip this up in under 10 minutes. It’s a fantastic option when you’re short on time but still want to impress. Busy weeknight? Toss together this aioli, and your dinner just got a glow-up.
2. Simple Ingredients
The beauty of this recipe lies in its ingredient list. You likely already have most of what you need in your pantry. Fresh garlic, mayonnaise, and a couple of seasonings make this a straightforward recipe.
3. Amazing Flavor Enhancer
Aioli elevates any dish. It offers depth to your fries, burgers, and sandwiches. Don’t forget to try it as a dressing in your pasta salads. Your family and guests will rave about your culinary skills!
4. Versatile and Customizable
Feeling adventurous? You can modify this recipe to fit your palate. Whether you want a hint of spice or a more robust garlic flavor, it’s all up to you. That’s the charm of cooking: making it your own.
Ingredients for Arby’s Garlic Aioli
Ready to roll? Here’s what you’ll need:

- ½ cup creamy mayonnaise
- 1½ tablespoons freshly squeezed lemon juice (about half a lemon)
- 2 entire bulbs of garlic
- 2 teaspoons extra-virgin olive oil
- 1 teaspoon Worcestershire sauce
- ½ teaspoon Dijon mustard
- ⅛ teaspoon ground cayenne pepper
- Pinch of smoked paprika
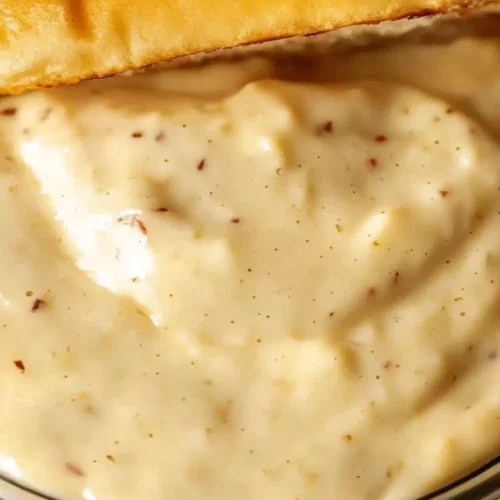
These ingredients come together to form a deliciously creamy, garlicky sauce.

Step-by-Step Instructions
Step 1: Preparing the Garlic
First, preheat your oven to 400°F (200°C). This may seem backward for aioli, but roasting the garlic is crucial. Take the bulbs of garlic and cut off the tops. Drizzle a little olive oil on them, wrap them in aluminum foil, and roast them for about 30-40 minutes. Roasting mellows the garlic’s strong flavor, resulting in a delicious sweetness.
Step 2: Mix the Main Ingredients
While the garlic is roasting, grab a mixing bowl. Add the mayonnaise, lemon juice, Worcestershire sauce, and Dijon mustard. Stir them together to form a creamy base. This base is the canvas for your masterpiece.

Step 3: Squeeze and Smash that Garlic
After the garlic has roasted and cooled slightly, squeeze the cloves out of their skins into your mixing bowl. I usually use the back of a fork to mash them into the mayo mixture, ensuring no lumps remain. The aroma will be intoxicating!
Step 4: Season It Right
Next, add the cayenne pepper and smoked paprika. These spices provide depth and a hint of warmth, creating an aioli that is bursting with flavor. Mix well, ensuring everything combines smoothly.

Step 5: Taste and Adjust
This step is key. Give your aioli a taste. You might find it needs a touch more lemon juice for brightness or additional seasoning. Cooking is about personal preference, so adjust accordingly.

Step 6: Chill and Serve
Finally, once you’re satisfied with your aioli, cover the bowl and place it in the refrigerator for about 30 minutes. This chilling allows the flavors to meld beautifully. When you’re ready, serve it with your favorite dish and bask in the culinary praise!

Notes
Here are some quick tips to help you succeed:
- Use Fresh Garlic: Fresh garlic has a much better flavor than pre-minced versions. Use whole garlic bulbs for the best results.
- Don’t Skip the Lemon Juice: It balances the richness of the mayo and adds a brightness that enhances the overall flavor.
- Adjust Spice Levels: If you like it spicy, double the cayenne. For milder palates, skip it entirely.
- Store in an Airtight Container: Keep it fresh by storing leftovers in an airtight container in the refrigerator.
- Explore Additional Flavors: Consider adding fresh herbs like parsley or dill for a different twist.

Nutrition Information
arby’s garlic aioli recipe nutrition facts

How to Store the Leftovers?
If you find yourself with extra aioli, fret not! Store it in an airtight container in the refrigerator for up to one week. Just give it a good stir before serving again. The flavors may deepen, making it even more delightful on round two!
Sides for Arby’s Garlic Aioli
Arby’s garlic aioli pairs well with numerous side dishes. Here are some standout options:
1. Crispy Sweet Potato Fries
The sweetness of sweet potatoes strikes a delightful contrast with the garlic aioli. Toss those sweet potato sticks in olive oil, salt, and pepper, and bake until crisp.
2. Fresh Veggies
Carrot sticks, bell pepper strips, and celery make for perfect dippers. The crunch of fresh veggies combined with the creamy aioli creates a refreshing combo.
3. Grilled Chicken Sandwich
Whether you’re grilling chicken at home or opting for a deli sandwich, a spread of garlic aioli transforms the ordinary into extraordinary.
4. Pasta Salad
Toss roasted veggies and chickpeas with pasta, and use aioli as a dressing. It’s a game-changer for your summer picnics.
Alternative Choices to Ingredients
If you’re missing some ingredients, fear not! Here are some alternatives:
1. Mayonnaise
Greek yogurt can replace the mayonnaise if you’re looking for a lighter option. It adds tanginess while keeping it creamy.
2. Lemon Juice
Apple cider vinegar works in a pinch, bringing acidity without the lemon’s citrus flavor.
3. Garlic
Garlic powder can substitute fresh garlic if you’re in a hurry. Use about half the amount, as it is more concentrated.
4. Worcestershire Sauce
Soy sauce can work as a substitute to bring umami flavor, though it will alter the taste slightly.
Arby’s Garlic Aioli Recipe
Equipment
- Oven
- Mixing Bowl
Ingredients
- ½ cup creamy mayonnaise
- 1½ tablespoons freshly squeezed lemon juice about half a lemon
- 2 entire bulbs of garlic
- 2 teaspoons extra-virgin olive oil
- 1 teaspoon Worcestershire sauce
- ½ teaspoon Dijon mustard
- ⅛ teaspoon ground cayenne pepper
- Pinch of smoked paprika
Instructions
- First, preheat your oven to 400°F (200°C). This may seem backward for aioli, but roasting the garlic is crucial. Take the bulbs of garlic and cut off the tops. Drizzle a little olive oil on them, wrap them in aluminum foil, and roast them for about 30-40 minutes. Roasting mellows the garlic’s strong flavor, resulting in a delicious sweetness.
- While the garlic is roasting, grab a mixing bowl. Add the mayonnaise, lemon juice, Worcestershire sauce, and Dijon mustard. Stir them together to form a creamy base. This base is the canvas for your masterpiece.
- After the garlic has roasted and cooled slightly, squeeze the cloves out of their skins into your mixing bowl. I usually use the back of a fork to mash them into the mayo mixture, ensuring no lumps remain. The aroma will be intoxicating!
- Next, add the cayenne pepper and smoked paprika. These spices provide depth and a hint of warmth, creating an aioli that is bursting with flavor. Mix well, ensuring everything combines smoothly.
- This step is key. Give your aioli a taste. You might find it needs a touch more lemon juice for brightness or additional seasoning. Cooking is about personal preference, so adjust accordingly.
- Finally, once you’re satisfied with your aioli, cover the bowl and place it in the refrigerator for about 30 minutes. This chilling allows the flavors to meld beautifully. When you’re ready, serve it with your favorite dish and bask in the culinary praise!
Video
Notes
- Use Fresh Garlic: Fresh garlic has a much better flavor than pre-minced versions. Use whole garlic bulbs for the best results.
- Don’t Skip the Lemon Juice: It balances the richness of the mayo and adds a brightness that enhances the overall flavor.
- Adjust Spice Levels: If you like it spicy, double the cayenne. For milder palates, skip it entirely.
- Store in an Airtight Container: Keep it fresh by storing leftovers in an airtight container in the refrigerator.
- Explore Additional Flavors: Consider adding fresh herbs like parsley or dill for a different twist.
Nutrition
Frequently Asked Questions
Conclusion
Creating Arby’s garlic aioli at home is a venture worth taking. It transforms everyday meals into culinary experiences. Not only is it quick and easy, but you also control the flavors and ingredients, ensuring a fresh, delicious result.
So gather your ingredients and start making this savory delight. Once you taste it, I’m sure you’ll find endless ways to incorporate garlic aioli into your meals. Happy cooking!
